
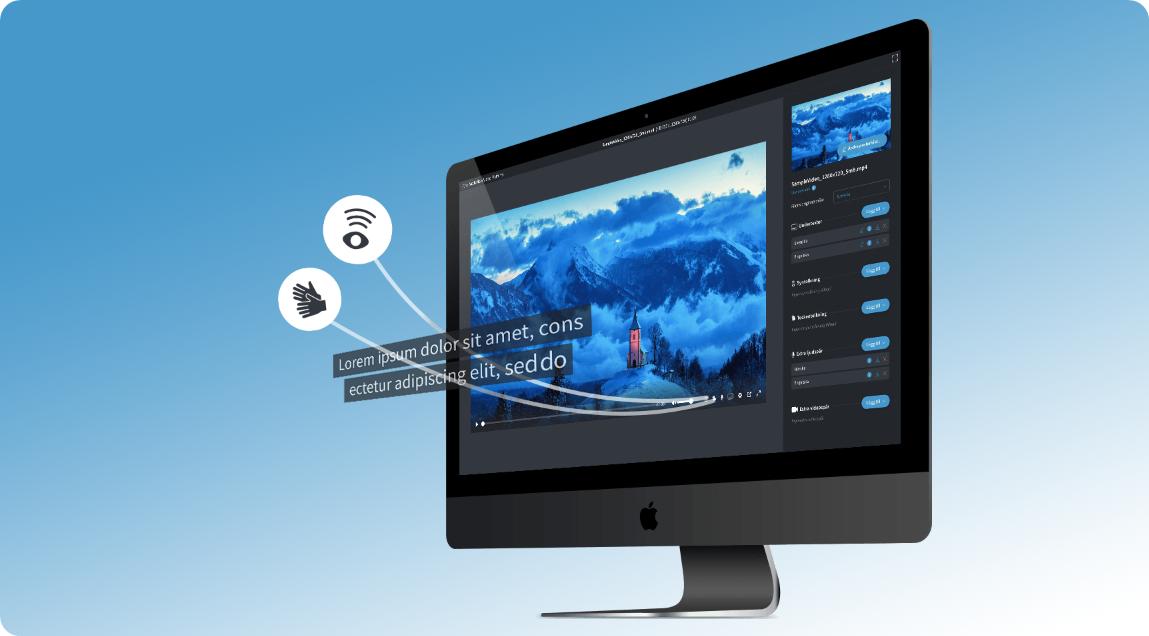
Here we look at how you can work with our accessibility adapted video player and video manager. You can work with subtitles, transcription, visual interpretation and much more.

In this video, John shows us how you can work with accessibility adapted video with our video manager / OVP module (swedish).

Table of Contents:
Set the original language of the file
Work with the "toggle" changer
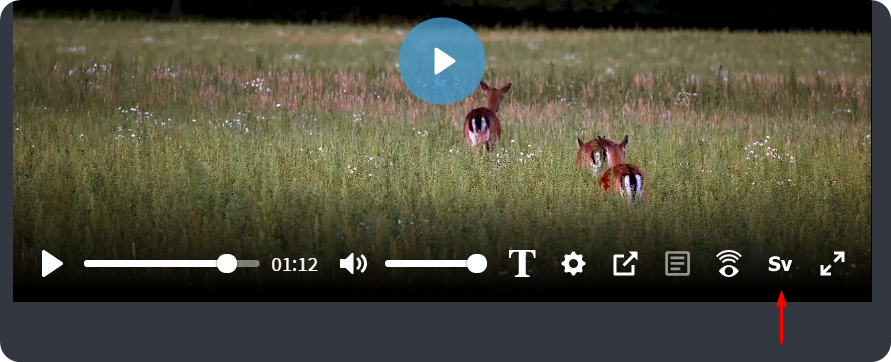
Overview of the video player
This is Mediaflow's new accessibility adapted video player that meet WCAG AA 2.1
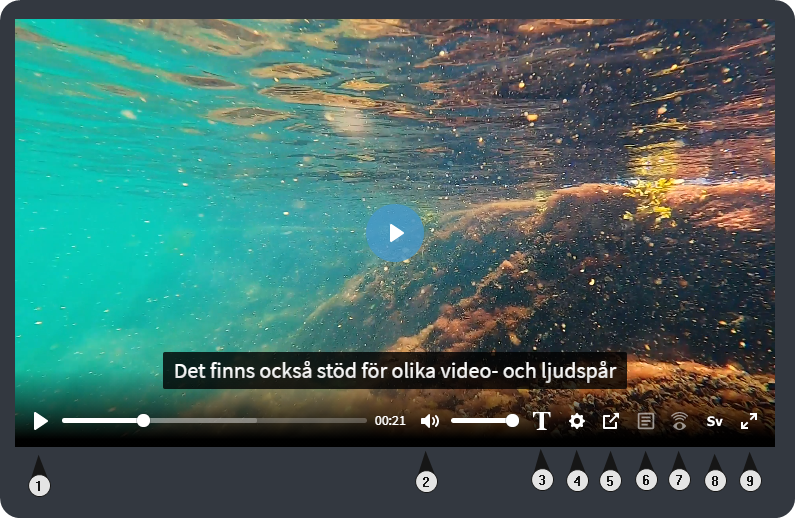
Overview icons
- Start and pause video playback.
- Turn the sound on and off.
- Switch subtitles on and off.
- Settings for subtitle language, video quality and playback speed.
- Turn on the "Picture in picture" function that allows the video to be played in a separate movable window.
- Turn the transcription box on and off, which puts the description text in a separate box outside the player.
- Turn on and off visual interpretation where an alternative descriptive audio track can be played.
- Change the main language of the video. This means that the other buttons activate the subtitles, audio tracks and the selected language.
- Maximize the video player.
Depending on how you set up a video in the video manager, the available controls for each movie are customized. The various icons will then be turned on and off depending on what alternative subtitles, video and audio tracks are available that are linked to the video.
If a film,for example, has subtitles and soundtracks in both Swedish and English, playback of these is determined with the small language icon (no. 8 in the list above). It is then possible to, for example, have English speech with Swedish text, etc. by changing the subtitle track with the gear.
Click here to return to the table of contents:
Upload a video
Start by uploading a video by dragging and dropping the file to a Mediaflow folder. The film clip will now be processed, which means that a few different sizes are rendered out. The following versions of a video are created and rendered after uploading
- Small video preview - this is the display image of the video
- The medium preview - this is the smaller clip you see in the upper right corner when you click on a video file in Mediaflow
- The "normal" size of the video - This is normally the 720p version
- HD version - of the video - This is the last step with maximum resolution for increased clarity when maximizing the video.
The processing of a video clip may vary over time depending on the server load and the length of the clip. It is also worth noting that videos with a "regular" size such as 1920x1080p (web standard) can be processed slightly faster than unusual size formats as the conversion processes are optimized for these more common formats.
When uploading a video, the following metadata is displayed in Mediaflow:
Längd, codec, titel, album, artist, track, genre, composer, bitrate video och bitrate ljud
Click here to return to the table of contents:
Manage video
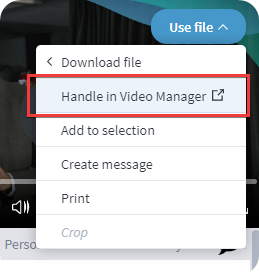
There are two ways to access the video manager from Mediaflow.
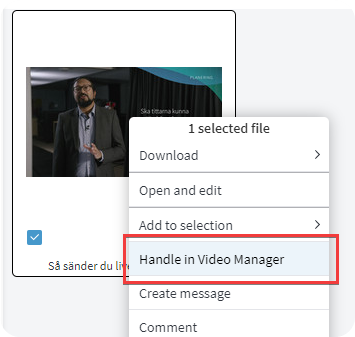
- Right-click on a video and select "Handle in Video Manager'' (OVP)
- Click Use File and select ''Handle in Video Manager'' (OVP)
Click here to return to the table of contents:
Select poster image
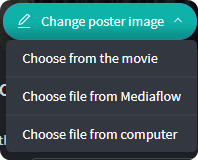
There are three ways to set a poster image for a video. The poster image is the preview image that is visible for a video in the portals.
- Choose from the movie
- Choose file from Mediaflow
- Choose file from computer
Here is an example of how to "scrub" through a movie to find a good poster image.
When you select a file from Mediaflow, only suitable files will be visible. So you can only select an image file as a poster image. A tip is to put an image in the same folder as the movie clip so it will be a little easier to find the image later.
Note that the poster image is not the same as the preview image / thumbnail.Preview images (small preview inside Mediaflow) are only visible in Mediaflow. Poster images are visible to the outside.
Click here to return to the table of contents:
Set the original language of the file
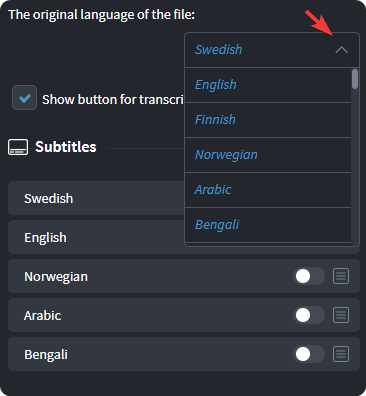
By setting the original language of a video, you can determine which subtitles, audio tracks wich will be activated from the beginning when watching the video in the portal.
The viewer can then switch between the languages you have entered, but this determines what is active from the beginning.
When you have set a file's original language, it determines the following default setting for the video clip. In this case, the video clip is initially set to play with Swedish subtitles and alternate audio tracks.
Click here to return to the table of contents:
Manage subtitles
Create new: The first option allows you to create your own subtitle from scratch. After you have clicked on "Create new", the file will appear under "Subtitles" where you currently see "English, Swedish, Swedish.
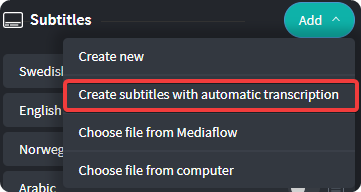
Create autotranscript - select language before transcription:
NOTE! The supplier of transcripts of subtitles is regulated in the personal data assistant agreement. We now have several subcontractors for subtitling and the range of languages can therefore vary.
The following languages are supported in Video Manager and which languages can be subtitled automatically with our most common subtitle provider.
| Language | Support for automatic subtitles |
| Swedish | YES |
| English | YES |
| Finnish | YES |
| Norwegian | YES |
| Arabic | YES |
| Bengali | YES |
| Bulgarian | YES |
| Dannish | YES |
| Dari | |
| French | YES |
| Galician | YES |
| Greek | YES |
| Hebrew | YES |
| Hindi | YES |
| Indonesian | YES |
| Italian | YES |
| Japanese | YES |
| Yiddish | |
| Catalan | YES |
| Chinese | YES |
| Korean | YES |
| Kurmanji | |
| Lithuanian | YES |
| Meänkieli | |
| Dutch | YES |
| Nepali | YES |
| Persian | YES |
| Polish | YES |
| Portuguese | YES |
| Romani Chib | |
| Romanian | YES |
| Russian | YES |
| Sami | |
| Somali | |
| Sorani | |
| Spanish | YES |
| Thai | |
| Tigrinya | |
| Turkish | YES |
| German | YES |
| Ukrainian | YES |
| Hungarian | YES |
| Urdu | YES |
When you select autotranscription, the box below will appear. You can then choose the language on which the service is based when the transcript is generated.
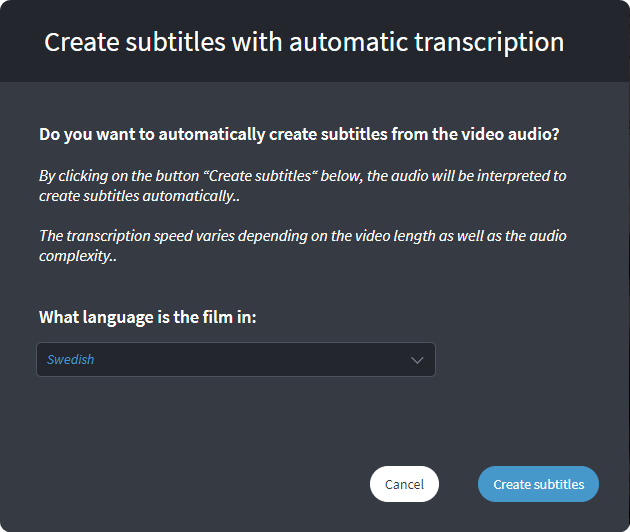

While the text is being generated, the subtitle above will appear in the blank red rectangle in the upper image. When the text is finished, the new subtitle will look the same as the others in the list!
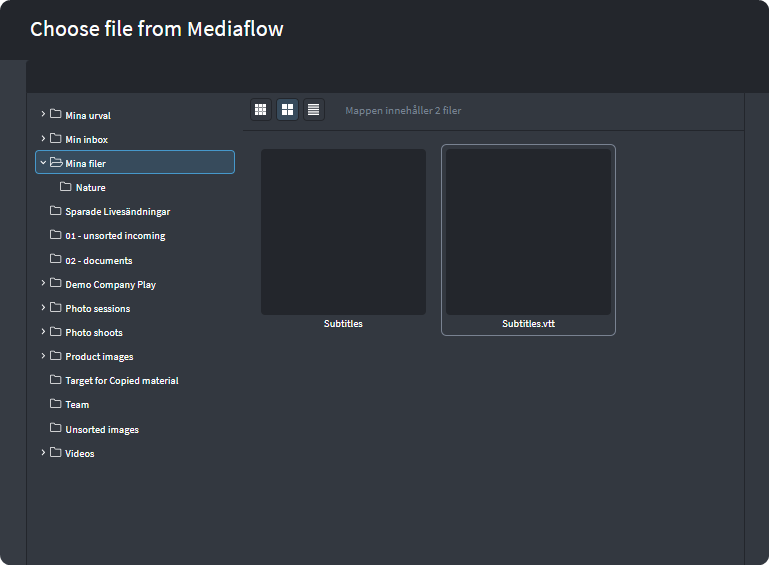
Add subtitles from file:
If you choose to create a subtitle from a file, it means that you select a file from Mediaflow. The files that you then see in your structure are only relevant files, ie either .SRT or .VTT
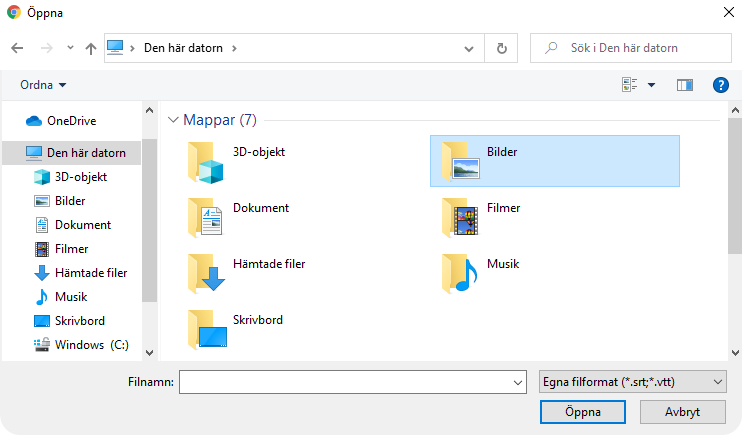
Select file from computer:
When you select this option, you simply get the option to select a text file from your computer / hard drive.
Select the type of subtitle.
Once you have selected a file to upload, you will see the following options.
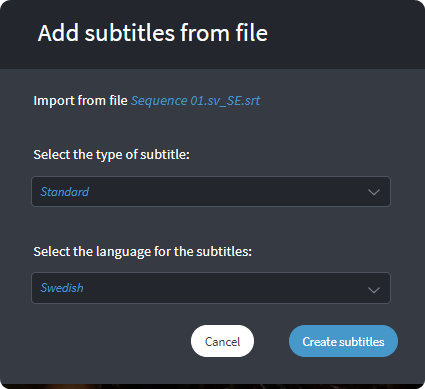
Here you select Type of subtitle and have the following options to choose from:
- Standard (Translation)
- Visual interpretation (For impaired vision, for example "Birds fly away")
- Visual interpretation - For impaired vision (descriptive text such as "the trees sway in the wind" etc)
- Description text (For hearing loss, for example "The man is out of breath". Things you do not see but can hear in the background)
After you have selected the type of subtitles, you can choose which language the text is in.
Click here to return to the table of contents:
Administer subtitles
By clicking on the setting button for a subtitle, you can access the administration options.

Delete - Deletes the subtitle file
Download - Downloads the subtitle file in .srt or .vtt format.
Show information - Here you can see the origin of the file and more.
Edit - To enter the subtitle edit mode.
Duplicate - To make a copy of a subtitle. For example, a copy of a English subtitle to have something to start from when you want to create a more descriptive subtitle for accessibility..
Click here to return to the table of contents:
Edit and work with a subtitle
To work with a subtitle, you start by clicking on the menu icon and selecting Edit.
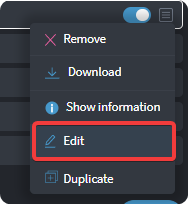
To work with a subtitle, you start by clicking on the menu icon and selecting Edit.
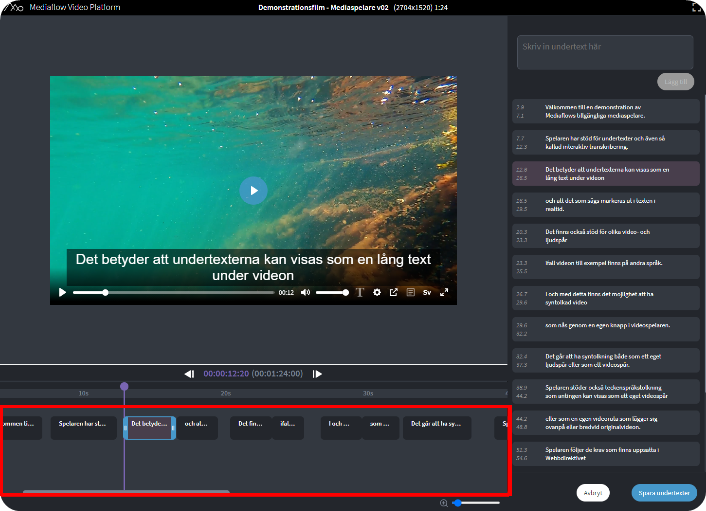
The video player then switches to a subtitle editing mode that looks like this.
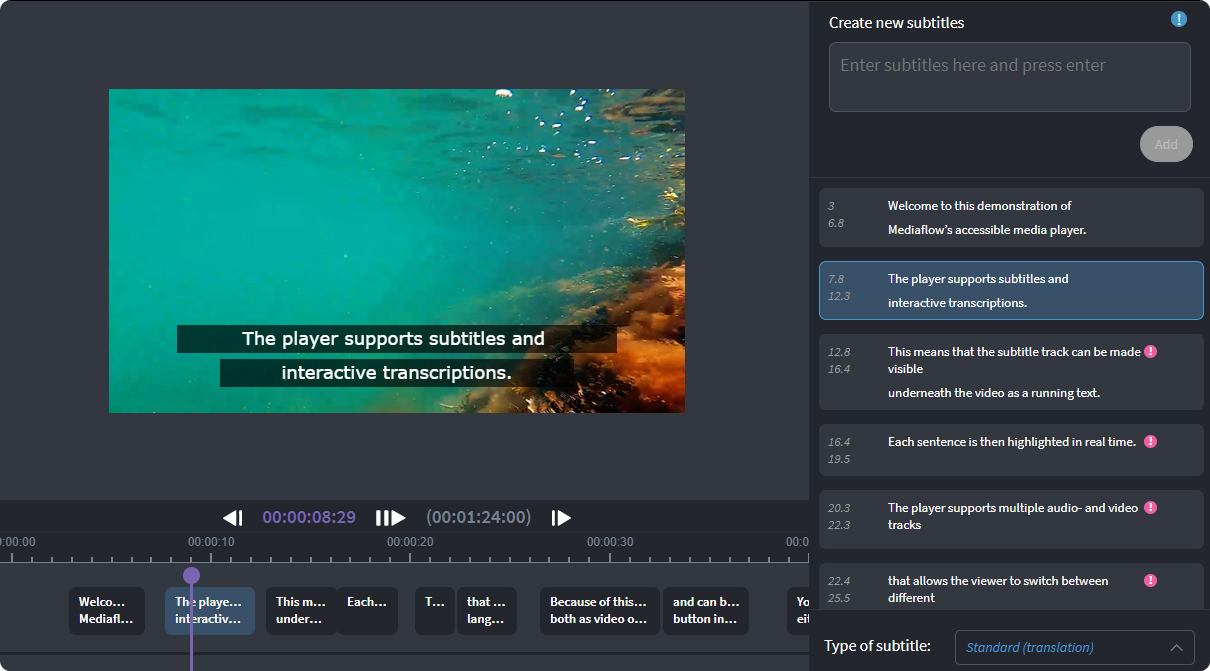
Below we go through the different parts and what you can do here:
Timeline player/ playback
Click the Play icon to play or pause the clip. You can also use Spacebar.
You can also drag the timeline player with the mouse.
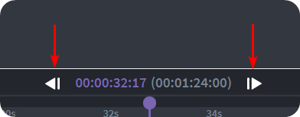
You can also click on these little arrows to move one frame at a time.
It is also possible to use the arrow keys on the keyboard to move one frame at a time.
Types of text blocks
There are two types of text blocks to make it easier to work with the subtitles. They are divided in such a way that one type is easy to manage, so that the pieces of text will end up in the right place in the video clip in terms of time. The other type is so that it will be easy to edit the text itself in the text blocks.
Lower text blocks
The lower text blocks are there to make it easy to edit when the text appears in relation to the video clip so that it is correct in terms of time. The easiest way to affect this is to simply move the mouse over a block of text and drag the handles to change the display time and position.
If you double-click on a lower text block, the text block will automatically be extended to the next text block.
Right text blocks
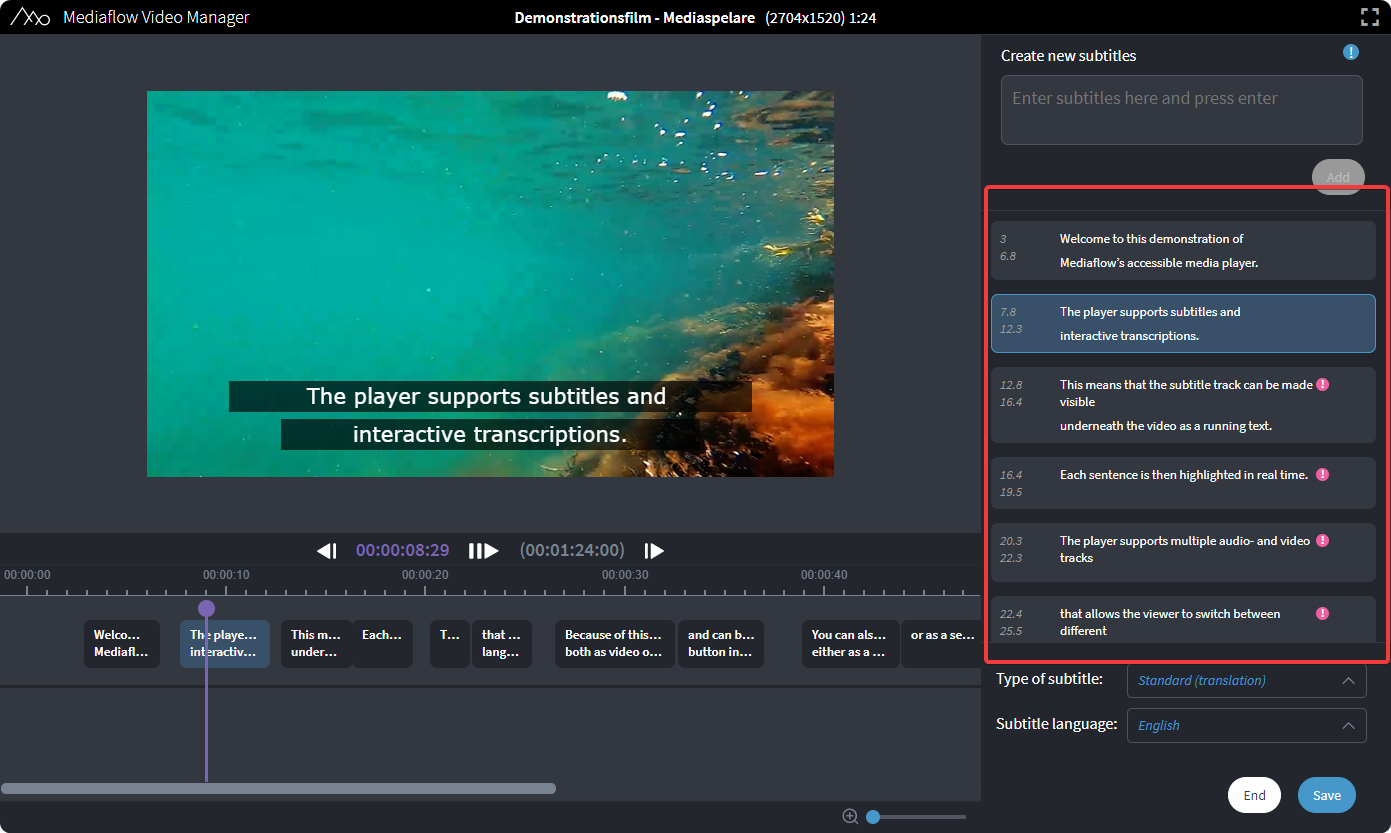
The right text blocks are for easy editing of the subtitle itself. Click on a block, edit the text and press Enter. You can also click on the tick or outside and the change is saved.
When you click on a text block, the video clip jumps to the correct position automatically.
You can also create a new text block by clicking the "add" button.
When editing a text block, you can press Ctrl+Enter to split a text block in half. The text block is then divided into two text blocks with half the time each.
When you are done with your editing, you click on Save subtitles.
Click here to return to the table of contents:
Work with the "toggle" switcher
The toggle determines whether something is published and visible to a portal or not.
Note that publication takes place the moment you press the toggle button!
At the moment, toggle changes are not visible directly inside the video manager. This will be added shortly.
Refresh the web window to see the publication in your video. For example, you may have added an English subtitle from file, then you simply need to refresh the browser window and you will be able to select the English subtitle and play the video to see the text in real time.
When you have edited a text, you must first Save the text and then use Toggle to "publish" the updated text. In other words; double-click the Toggle button to unpublish and then publish again, then the change will be visible externally.
We will soon add a "publish" button inside the subtitle editor, but until then, you have to do this so that changed text will be visible.
Keep in mind that a subtitle, audio track, etc. will be visible to the portal as soon as you toggle it on in Video manager. It's best to have something toggled off until you're done with the subtitle in the subtitle editor. You can then enable it to see how the finished result will look in the portal.
Click here to return to the table of contents:
Add extra audio tracks
Audio formats we support are mp3, aac and wav.
The player itself uses aac, so if you select a wav file, it is then converted to aac for playback.
You can add an additional audio track for visual interpretation. It can be a soundtrack that is extra descriptive for people with impaired vision. You can select an audio track in one of two ways:
- Select file from Mediaflow
- Upload from computer
When you have selected a file, a box appears where you can enter the Type of soundtrack.
Here you can specify whether the soundtrack is one of the following:
- Standard (audio track in another language)
- Visual interpretation audio (for visually impaired)
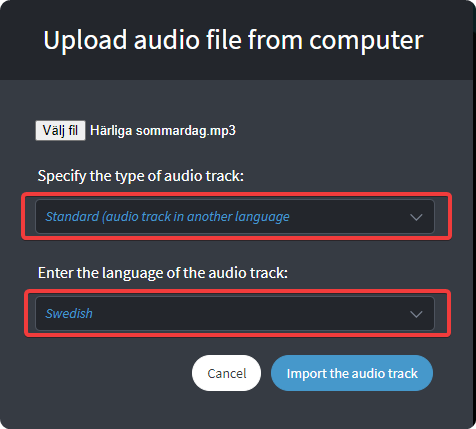
Then specify the language the audio track is in and click Import the Audio Track.
Click here to return to the table of contents:
Add extra video tracks
You can also add an extra video track for, for example, the same video where audio has been added in a different language.
Here it is only possible to select a file from mediaflow at the moment, but support for selecting from the computer will be added in the future.
When you have selected a file, you will get a box where you can enter the Type of Video Track.
This is preset for Video in another language.
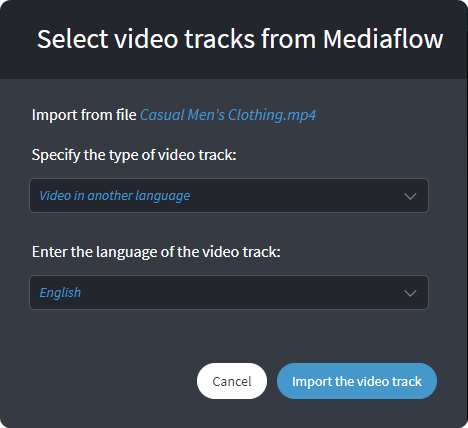
Then enter the language the video track is in and click Import the Video Track.
Click here to return to the table of contents:
Add Visual Interpretation
When you want to add a file for visual interpretation, there are several options to choose from. The option you choose causes the file to be accessed via the various icons later. A descriptive text for machine reading is accessed from a different icon than a descriptive audio file, and so on.
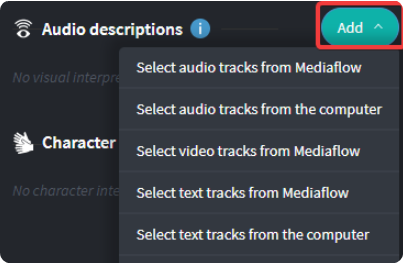
- Select audio track from Mediaflow
- Select audio tracks from the computer
- Select video tracks from Mediaflow
- Select text track from Mediaflow
- Select text tracks from the computer
When you have selected a file, you will get a box where you can enter the Type of Video Track.
This is preset to Visual Interpretation Film (for low vision).

Then enter the language the video track is in and click Import the Video Track.
Click here to return to the table of contents:
Add character interpretation
When you want to add a file for character interpretation, it must be a video file.
- Select video tracks from Mediaflow
Here it is only possible to select a file from mediaflow at the moment, but support for selecting from the computer will be added in the future.
When you have selected a file, you will get a box where you can enter Type of character interpreter.
This defaults to Movie with embedded character interpretation.
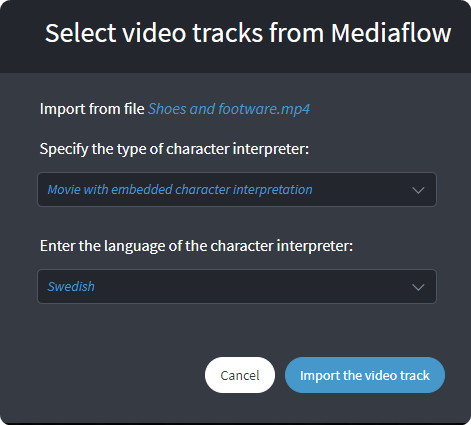
Then set the language for the signer clip and click Import Video Track.