
Here we go through how our InDesign plugin works and how you can work with it. (For Mac and Windows)
The purpose of our InDesign plugin is to be able to mount images directly from Mediaflow to your document without having to download these manually to your computer first, this is handled automatically instead. Documents that have links to Mediaflow images unlike traditional links can then advantageously be opened in different computers without the linked images having to be sent over separately but these can be downloaded using the plugin. We also recommend that you combine your workflow with Mediaflow Save/Open plugin, which enables the Indesign document to be opened and saved directly from within Mediaflow.
Table of Contents
Installation of plugins/extensions
Find Mediaflow Connect in InDesign
Manage linked images with Mediaflow Links
When you open an InDesign document on another computer
Import InDesign document links to Mediaflow
Installation of plugins/extensions
You install the extension via Creative Clouds plugin management. Sort by InDesign plugin and search for "Mediaflow". You can too click here! to go directly to the Adobe Exchange page for the plugin. On this page there is a direct link to the installation file in Creative Cloud.
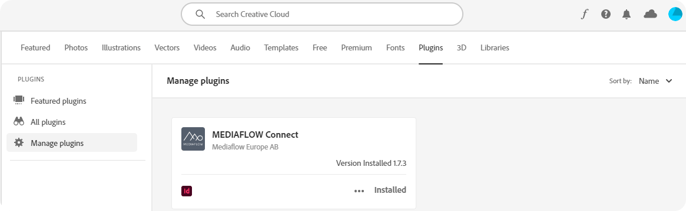
In CC Desktop, you can update the plugin by navigating to Stock and Marketplace - Plugins and then selecting Manage Plugin Programs (see image below).
Here, you can click the blue Update button to install the latest version of the plugin.
We strive to always have a plugin that work with the latest version of InDesign. However, when new updates are released there might be a slight delay before our plugin is up to date.
Find Mediaflow Connect in InDesign
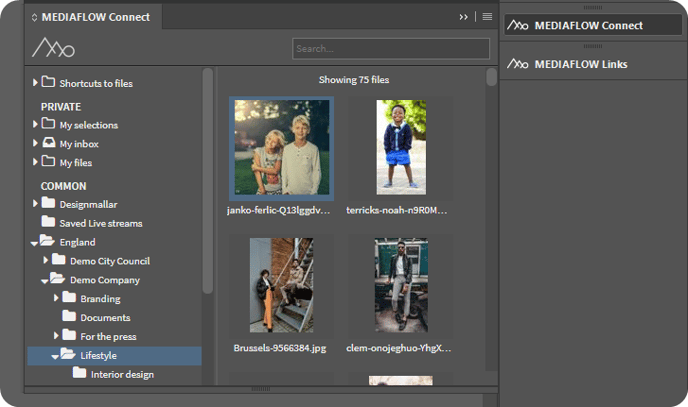
After installation start InDesign and go up to windows - extensions where you should now be able to see the following:
The text shown is from a Swedish installation of InDesign - The English version will look slightly different from the image shown below.

- MEDIALFOW Connect is used to browse its folder structure and select the image for mounting.
- MEDIAFLOW Links are used to manage linking between images that are linked directly to Mediaflow in the document (these can also be seen in InDesign's own link panel).
Login
The first time you click on the extension you must log in. Then use the same information as you have to log in to Mediaflow.

The image bank Mediaflow is accessible as a panel (palette) inside InDesign. The panel follows the lnDesign standard and you can, among other things, resize, minimize, dock at the edge or group together with other panels. The content of the panel is responsive to make maximum use of the surface regardless of size.
In the panel you can access the same folder structure as in Mediaflow. In addition to the archive folders, you also have access to your personal folders, selection folders and your inbox for files. The panel also has a search box where you can search for files in the same way as in the quick search in Mediaflow. The folder structure and content are live-connected to Mediaflow's servers which requires a working internet connection to work.
Mounting image
After logging in, you will be greeted by the same folder structure that you see inside Mediaflow.
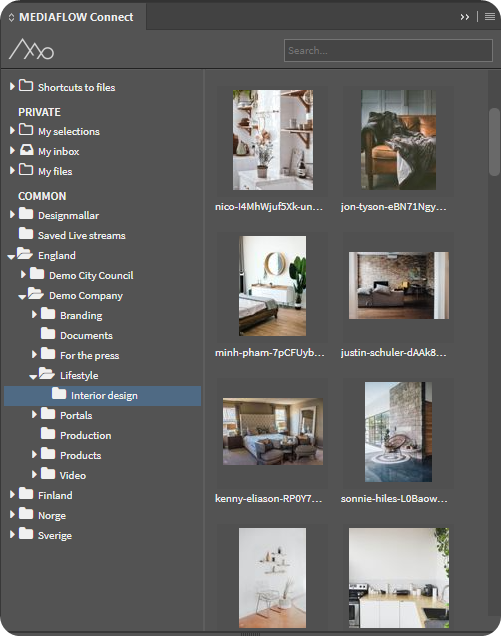 Here you see the same folder structure as in Mediaflow, and you can search or browse to find an image. You can then double-click on an image to quickly mount a low-resolution version (this can be configured), or right-click on an image and choose "Mount Low-Resolution" or "Mount Original." After a short moment, a small thumbnail appears at the cursor, and you click in the document to mount the image, which can then be cropped and edited with the usual InDesign tools, just like regular images. If an image is already selected on the page, it will be mounted in the selected frame. If you want to mount multiple images at once, you can double-click on all of them first, and then when the cursor leaves the panel area, all of them will be mounted in sequence.
You can also right-click on an image and choose "Show Image Information" to access more details about the image, such as metadata, rights, and similar information.
Normally we recommend mounting the images in high resolution. Low-resolution images can be used for location and performance reasons if the original images are very high-resolution or if you only want to test with different images and do not want to download them in the original format. If you have selected low-resolution images and want to complete your original for example create a PDF or send a package for printing you must first replace these with the high-resolution images. To do this in Mediaflow Links right-click on the images marked with L and select "Mount as high resolution" or select "Mount all as original" in the menu to replace all low resolution. If you create an Indesign package and low-resolution images are linked you will receive a warning about this.
In addition to pixel images, EPS and PDF files can also be mounted via the plugin.
Settings
 InDesign operates in a way that linked images in a document must always be present on your computer or network and cannot be linked via the internet. Therefore, Mediaflow's plugin will automatically place copies of the images you mount on the computer where the plugin is installed. There are some options available, accessible by clicking through to the plugin settings in this manner:
If you use the "In a temporary folder" option below, links can be broken in documents!
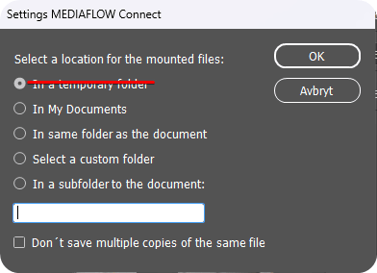 The "In a temporary folder" option is not recommended since Adobe made an update where InDesign now cleans these files. Linking to images can be broken and they must be reloaded with the MEDIAFLOW Links tool (more on that below). The other options work well. If you have a lack of space on your device you can choose to put all the images in a folder on another device, disk or network location.
When the settings change you must save your document for the changes to take effect.
Manage linked images with Mediaflow Links

Images mounted from Mediaflow are tagged internally in the InDesign document with an ID that connects the mounted image with the original file in the image bank and the locally downloaded version (low resolution or high resolution depending on what you choose when mounting). This enables the image to be updated in a simple way as for example there is a new edited version of the image in the image bank and the low-resolution image can be replaced with the real original. You can access these functions through the link manager available in the panel.

In the example above we see a summary of five images in the document.
- Three of them are on page one and the other two are on page two.
- One of the images has been removed from Mediaflow which means that only the low-resolution version of the image (which is always stored in the document) is visible, the image file name is gone from MEDIAFLOW Links and the file has been given a D (Deleted) mark.
- One of the images has been edited and updated inside Mediaflow, which means that it now has a U (Updated) mark on it which shows that a newer version of the image is available.
- One of the images has been mounted in a low-resolution version which means that the image has an L (low-resolution) on it.
In the link manager "Mediaflow Links" you get an overview of all images that are mounted from Mediaflow and you see what the image looks like, which page and layer in the document it is mounted on, if it is mounted low or high resolution, any restrictions from image bank and if there are new updates to the image. From there, you can update individual images or choose to download and re-link to the high-resolution original.
Since the original file has exactly the same proportions as the low-resolution version, the image is updated correctly on the spot with the same location, cropping and physical size. It is also possible here to perform that operation on all files that are not downloaded in high resolution (for example before printing or packing the entire document). This also allows you to re-download all files from Mediaflow should the linked files be lost for any reason.
List of the different letter markings that appear in the Mediaflow Links extension.
D - Deleted - The image has been deleted from Mediaflow
M - Missing - The image is deleted from the local disk
U - Updated - Updated image is available in Mediaflow
L - Low resolution - The image is mounted with a low resolution version
Send original
If you need to send originals to employees or external partners who are not Mediaflow users you need to send both documents and linked images. This can be done in two different ways:
1. Use InDesign's default function to create packages under File> Packages. All linked images from both Mediaflow and others will be saved in the package.
2. Set the selection in Mediaflow Connect to "In a subfolder of the document" and enter the name of the subfolder to "Links". In this way the images you choose from Mediaflow will be placed together with your document and you will be able to easily pack and send these without having to create separate Indesign packages (fonts will need to be sent separately)
When you open an InDesign document on another computer
If you open an InDesign document on another computer the files will initially not be locally on your hard drive and will need to be downloaded to the new computer you are sitting on. Here to you use the MEDIAFLOW Links extension as follows. The user of the other computer must therefore have permission to access these images.
Also note that the local copies of images you have mounted will not be cleared automatically. If you have deleted these and want to reload them the following applies to restore the files.

Click on the menu icon at the top right. Here you can then select "Mount images lo-res". This means that all missing images are downloaded to your computer and you can continue working with the document as usual. Here you can also mount all images in high-resolution (original) version. If there is a newer version of the image (it then gets a U on it here in the list) then you can select "reassemble all updated" which means that the latest version of the image is mounted in the document.
All communication with Mediaflow's servers is encrypted over the standard HTTPS protocol and does not normally require any special settings in firewalls and networks.
Import InDesign document links to Mediaflow
If you have a need to import folders with documents and linked images that have been created traditionally this can be done via FTP. In this way subfolder structure is maintained with associated images and fonts and you can then see by examining the folder which images are linked. Even if the same image is used in several documents and will then be in several "Links" subfolders, no physical copies will be created. Mediaflow's image detection will only create a new link to the folder from the original image and fonts.