
Information on the right side info panel. The different tabs and what folder or file information they contain.
Table of Contents:
With File selected With Folder highlighted
The following text applies when you have a file selected. Selected folder options come further down in a separate section.
General about the right info panel
The right info panel contains quite a lot of information. We will now go through the different tabs and show what sub-tabs they have connected to them and what information you can find there.
When you select a file, five tabs appear in the right info panel with detailed information about the file under the following tabs: Info, Indexing, People, License, and Security.
Info
Under Info you have the sections Basic Info, Usage, History, Metadata and Versions.
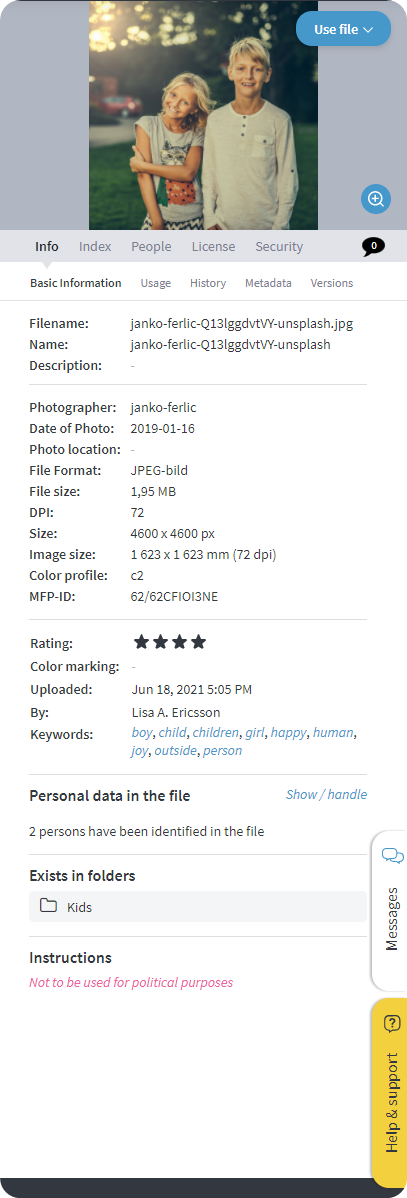
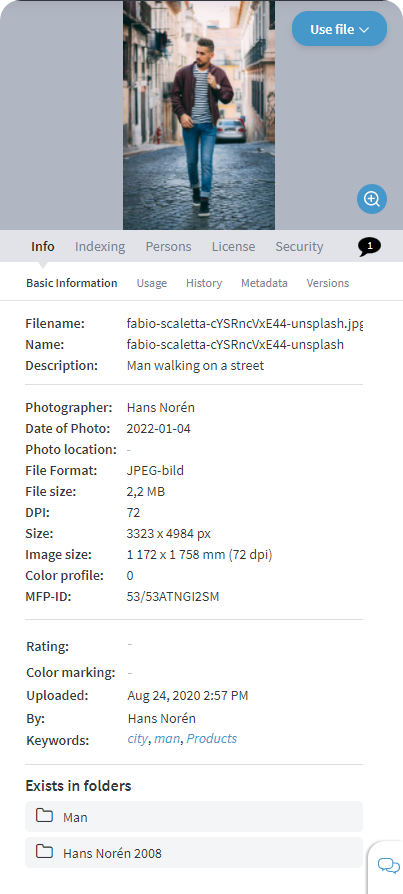
Basic info
Here you will find basic information about the selected file, especially useful are all the keywords entered here.
- File name
- Name
- Description
- Locations
- License
- May be used
- Model condition
- Models
- Model info
- Photographer
- Photo date
- Photo location
- File format
- File size
- DPI
- Size, px
- Image size, physical in mm
- Color profile
- MFP ID
- Rating
- Marking
- Uploaded
- Of
- Keywords
Use
To view an image or other media file, you can enter information about how
it should be used. Under Info in the Right side Panel you have the Usage tab, with information
registered on the selected file.
• Reported, when / by whom
• Responsible, name
• Project, name
• Time for publication
• Use, what / which
• Department
Under Use there is also a form where you can enter new information regarding
publishing and uses such as web, print, poster, advertisement and
Other.
History
Under the History tab you can directly see how the image has been used before and where it is used now, for example in printed matter and on the web. Here you will find information about all history about uploading and downloading, as well as history about folder management of the selected file. History lies under Info in the Right Panel.
Metadata
If there is already metadata on a file such as photo date, coordinates, camera model, etc.,
you will find that information here. Metadata is located under the Info tab in the Right Panel, and
shows information registered on the selected file:
• Camera manufacturer
• Camera model
• Photo date
• Exposure time
• Aperture number
• Exposure Comp.
• Flash
• Focal length
• ISO-speed
• Exposure program
• Measuring mode
• White balance
• Latitude GPS
• GPS Longitude
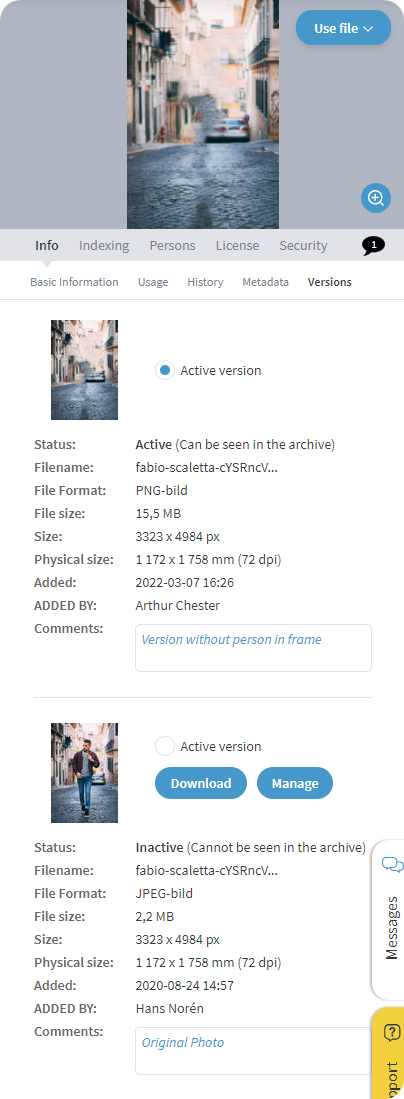
Versions
To create space, but also to organize and make file searching faster.
The system avoids duplicates. Mediaflow is therefore always presenting thumbnails based on a single file, but the same file may exist in different folders at the same time. This means that if you add keywords or change information for any given file this information changes in all folders where the file can be seen.
If you download and edit a file, and then upload it to the system again, you can
save the edited file as a new version. When you select a file, the Versions tab appears
in the Right Panel. Here you can compare different versions of the file, with help
of information about:
• Status, active / inactive, displayed in the archive or not?
• File name
• File format
• File size, bytes
• Size, px
• Physical size, mm, dpi
• Posted, time
Posted by, name
• Comment
Here you can also choose which version that will be the "active" version as well as download or manage the files.
Indexing
You can index your media files to get better search results. When you select a file, you can add information about the file, such as keywords, color markings, ratings, and more. Go to the Indexing tab in the Right Panel, in order to:
• Enter search word
• Add plural forms, can be added automatically from the thesaurus
• Description
• File name
• Name
• Photographer
• Photo date
• Rating
• Labeling
• Important instructions
• Other information
Here you can also add your own fields for indexing, adapted to your own business. This
is done under the Cog wheel - Custom Field.
People
Under this tab, there is information relevant to personal data management. See our GDPR article (swedish) for more information.
License
Under the license tab you can register license rights, ie the rights that apply to how you may use a file. The following fields can be filled in with information. Note that several of these open up for several options if you choose one of the options.
Author / photographer
• Namn
• E-post
• Telefon
• Ort
Licensing rights
Creative Commons license
Limited rights exist
Model condition
• Other information
Here you can enter other information about restrictions, contact information for model, etc.
Security
Different user groups may have permissions adapted to their use. External group
customers may not have the same permissions as the Photographers group. You can put
group-level permissions under the Security tab, which appears in the Right Panel when you
selects a file. Users in a selected group can be assigned different rights, by you
selects or deselects one or more of the following permissions:
• Remove
• Index
• Move
• Download
• Report
The following text applies when you have a Folder selected. Options for the selected file can be found further up in a separate section.
Three levels of permissions
You can set permissions in Mediaflow on three different levels:
• Group level, basic permissions for users in a group, for example
ability to download files.
• Folder level, for example which groups are allowed to download files in a specific folder.
• File level, for example which groups can download this particular file.
Under Manage Users, create user accounts for Mediaflow users. Here, in addition to user information such as name, e-mail, telephone, etc. You can also enter group affiliation, time-limited accounts, keywords linked to the user and the like.
It is usually enough to set permissions at group level
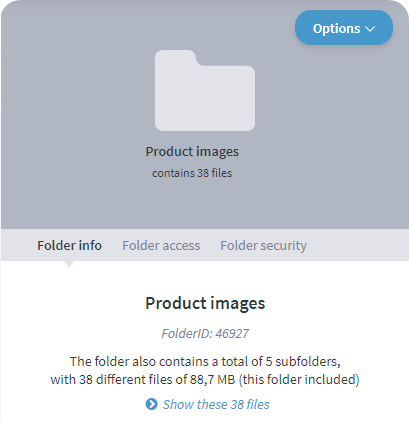
Folder Info
Under the Folder Info tab that appears in the Right Panel when you select a folder, you get
detailed information about the number of files and the size of the folder. If the folder contains
subfolders, there is also information about these. Incidentally, there is a box with user tips
regarding download.
Folder access
Under the Folder Access tab that appears in the Right Panel when you select a folder, you can specify
authority for which groups should be able to see the folder and its contents. A buck means that
members of the group can see the folder, and a cross denies them access.
Folder security
The tab shows Folder Security in the Right Panel when you select a folder. Here you can put different
permissions on files. Each permission can be set either permissive (a blue check mark) or
negative (a red cross), or not at all (an empty box). By clicking on the same check box
several times it switches between these three modes. By default the Allow subfolders box is displayed
inherit these settings checked, which means that the permission settings you make are set
also on any subfolders. New subfolders that are created later will also come
inherit these settings.