Install instructions for Umbraco Plugin and other relevant Plugin information
This package is an extra addon - Please contact Mediaflow support for more information.
Prerequisites
There are some steps to take to ensure that the plugin is working correctly.
- You need to ensure that the webserver hosting the Umbraco site does not block traffic to the mediaflowpro.com domain. The plugin need to communicate with the servers to fetch data from Mediaflow.
- You need to ensure that files and folders in Mediaflow that should show up in the plugin inside Umbraco has the correct permissions to allow the plugin to show the files and folders.
Install instructions
The plugin is installed via Nuget and can be found here https://www.nuget.org/packages/Mediaflow.Umbraco/. The installation will create a Mediaflow data type that can be used in views to embed images and videos from our system and a Macro that can be used in RTE editors and in the Umbraco Grid.
When the package is installed you need to configure your installation with your MFP key and a media folder where the local version of the image is saved. You can find the settings page as a tab under Umbracos settings section.

You can find your MFP key by, in Mediaflow, click on the gear icon > Integrations > Umbraco
Using the datatype
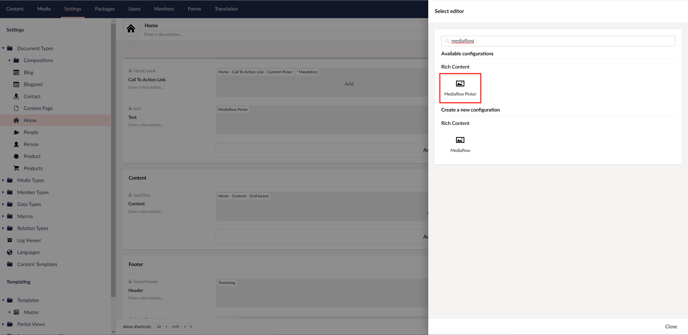
To use the Mediaflow picker you need to add it to your document type, go to your document type in settings and add a new property where you pick the "Mediaflow Picker" type under "Available configurations". Mediaflow should then be ready to use on that page.
To use the Mediaflow datatype in RTE edtior you can click the "Macros" button in the RTE editor and pick the Mediaflow Macro, this will insert the image or video of your choice in the RTE.

Using the picker
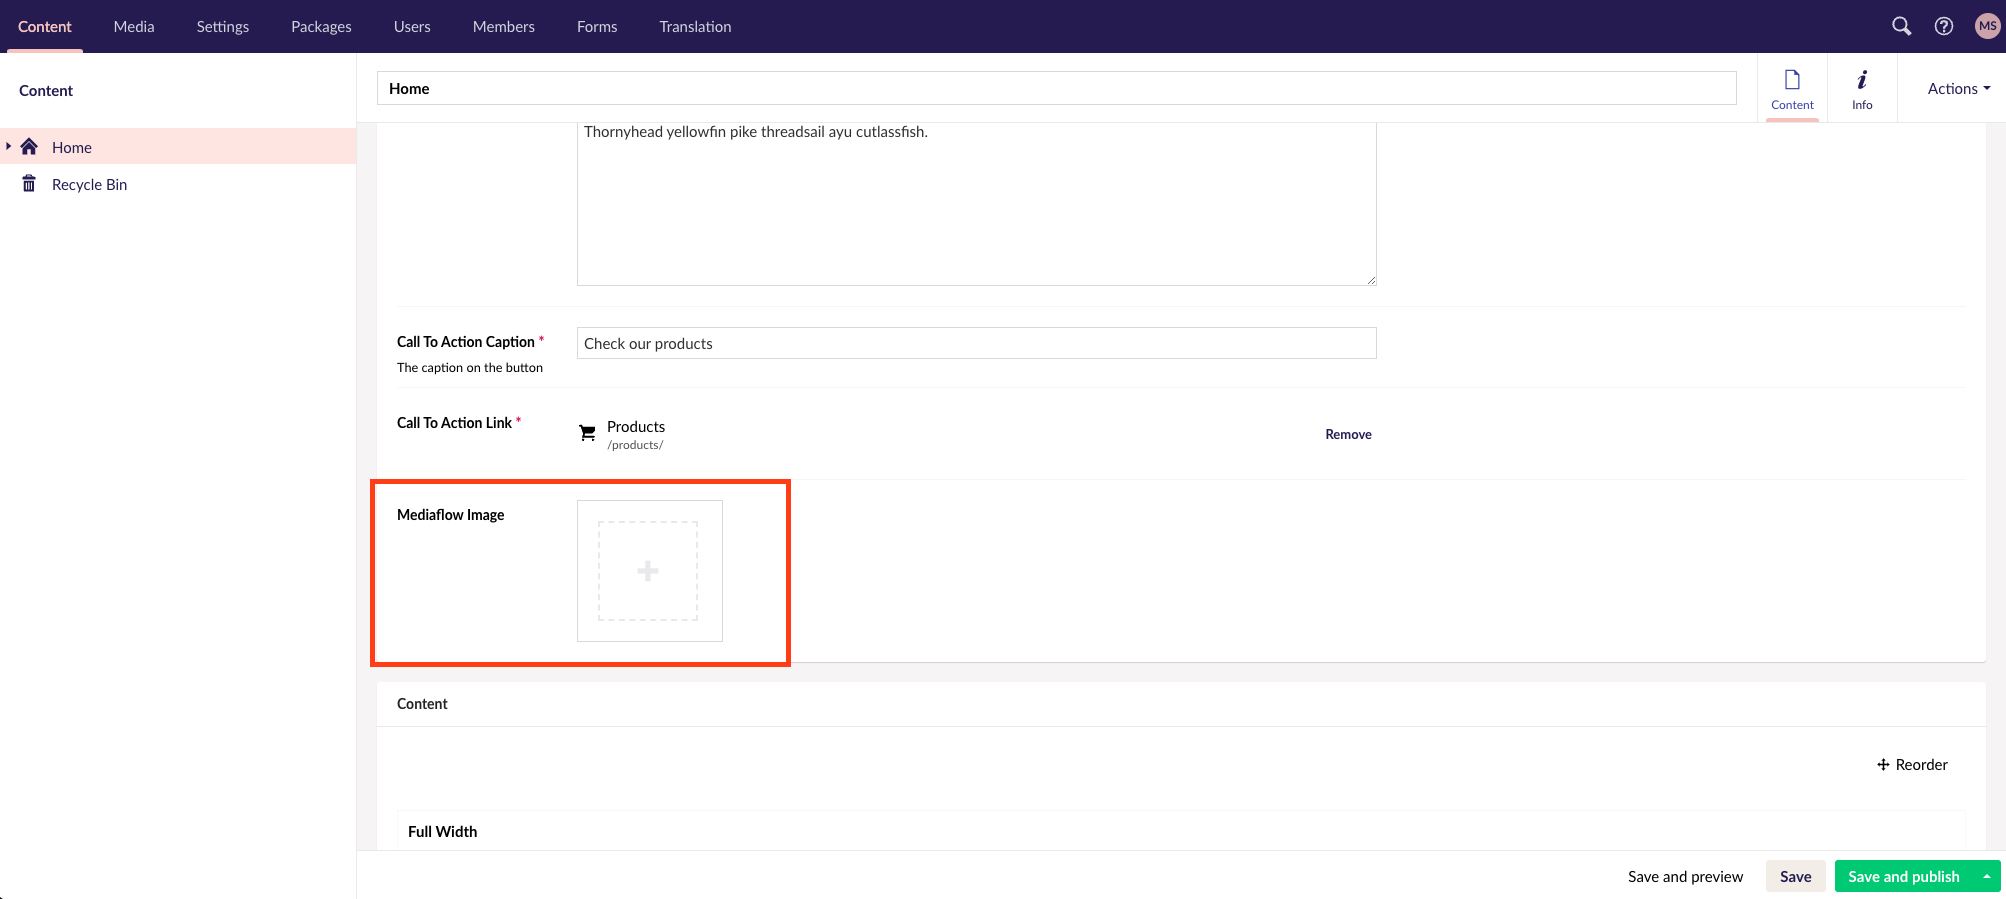
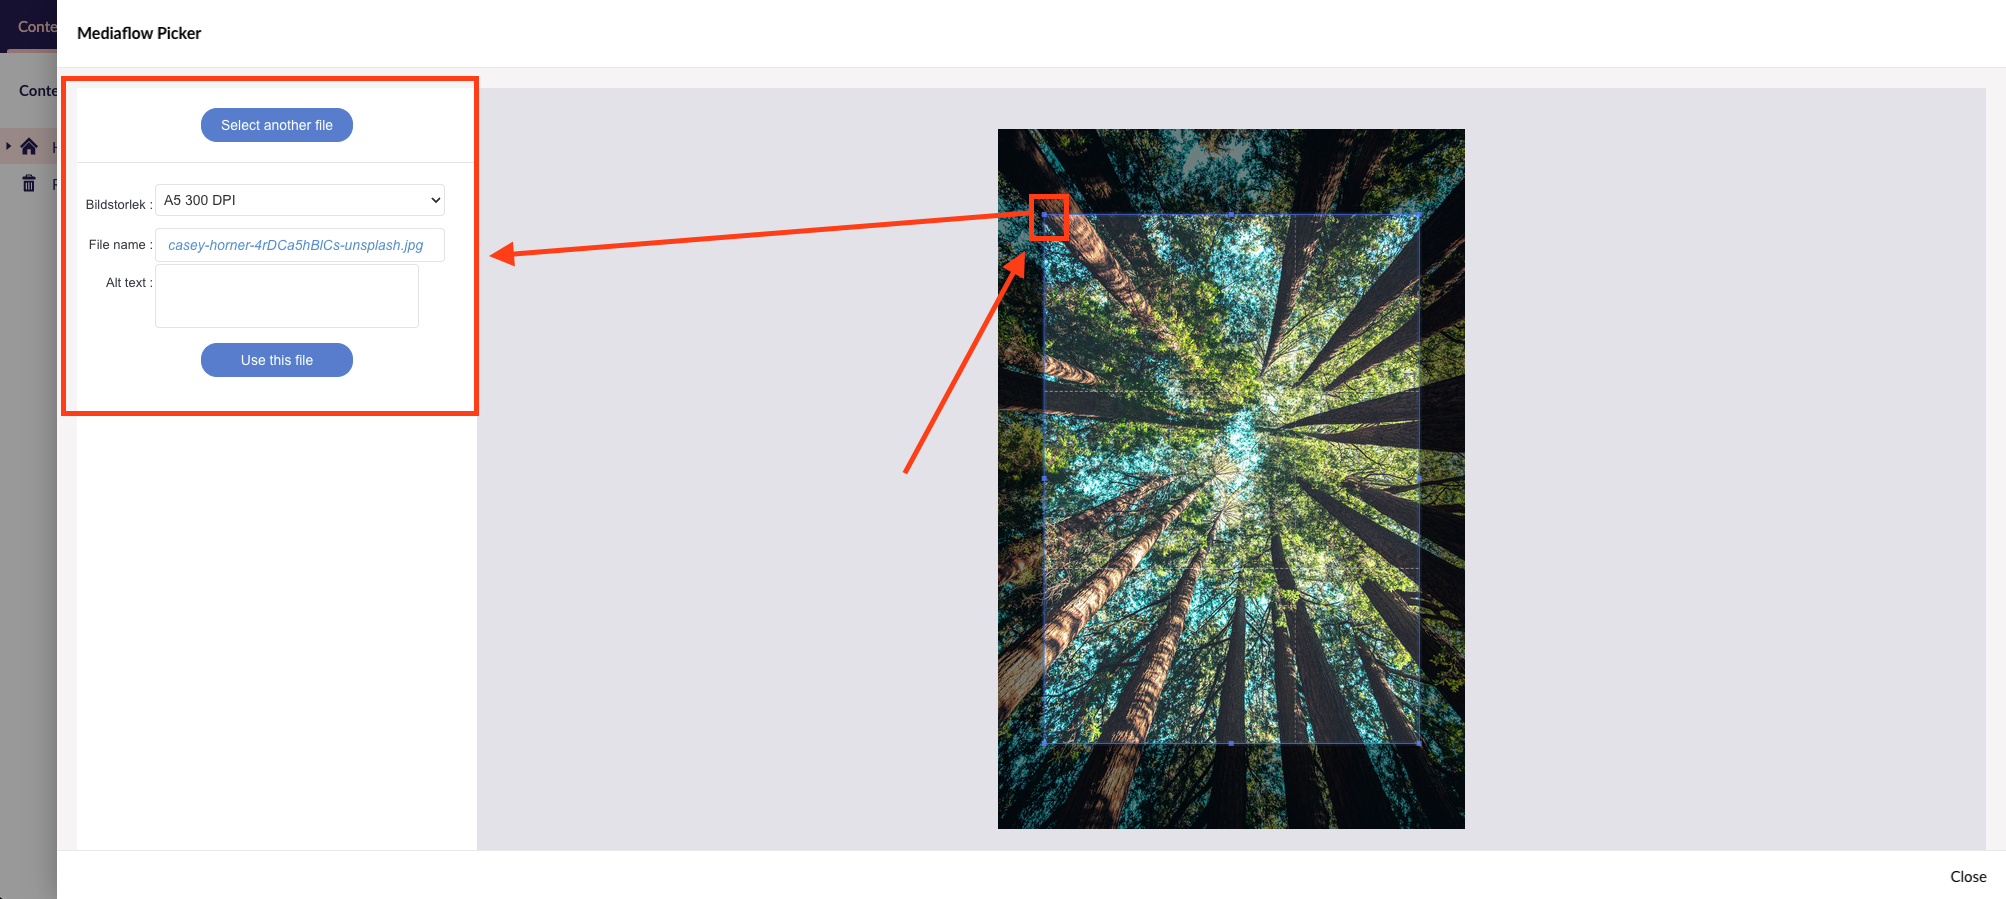
Access the page with the picker on it and click the Mediaflow picker. This will open up a new window.
-
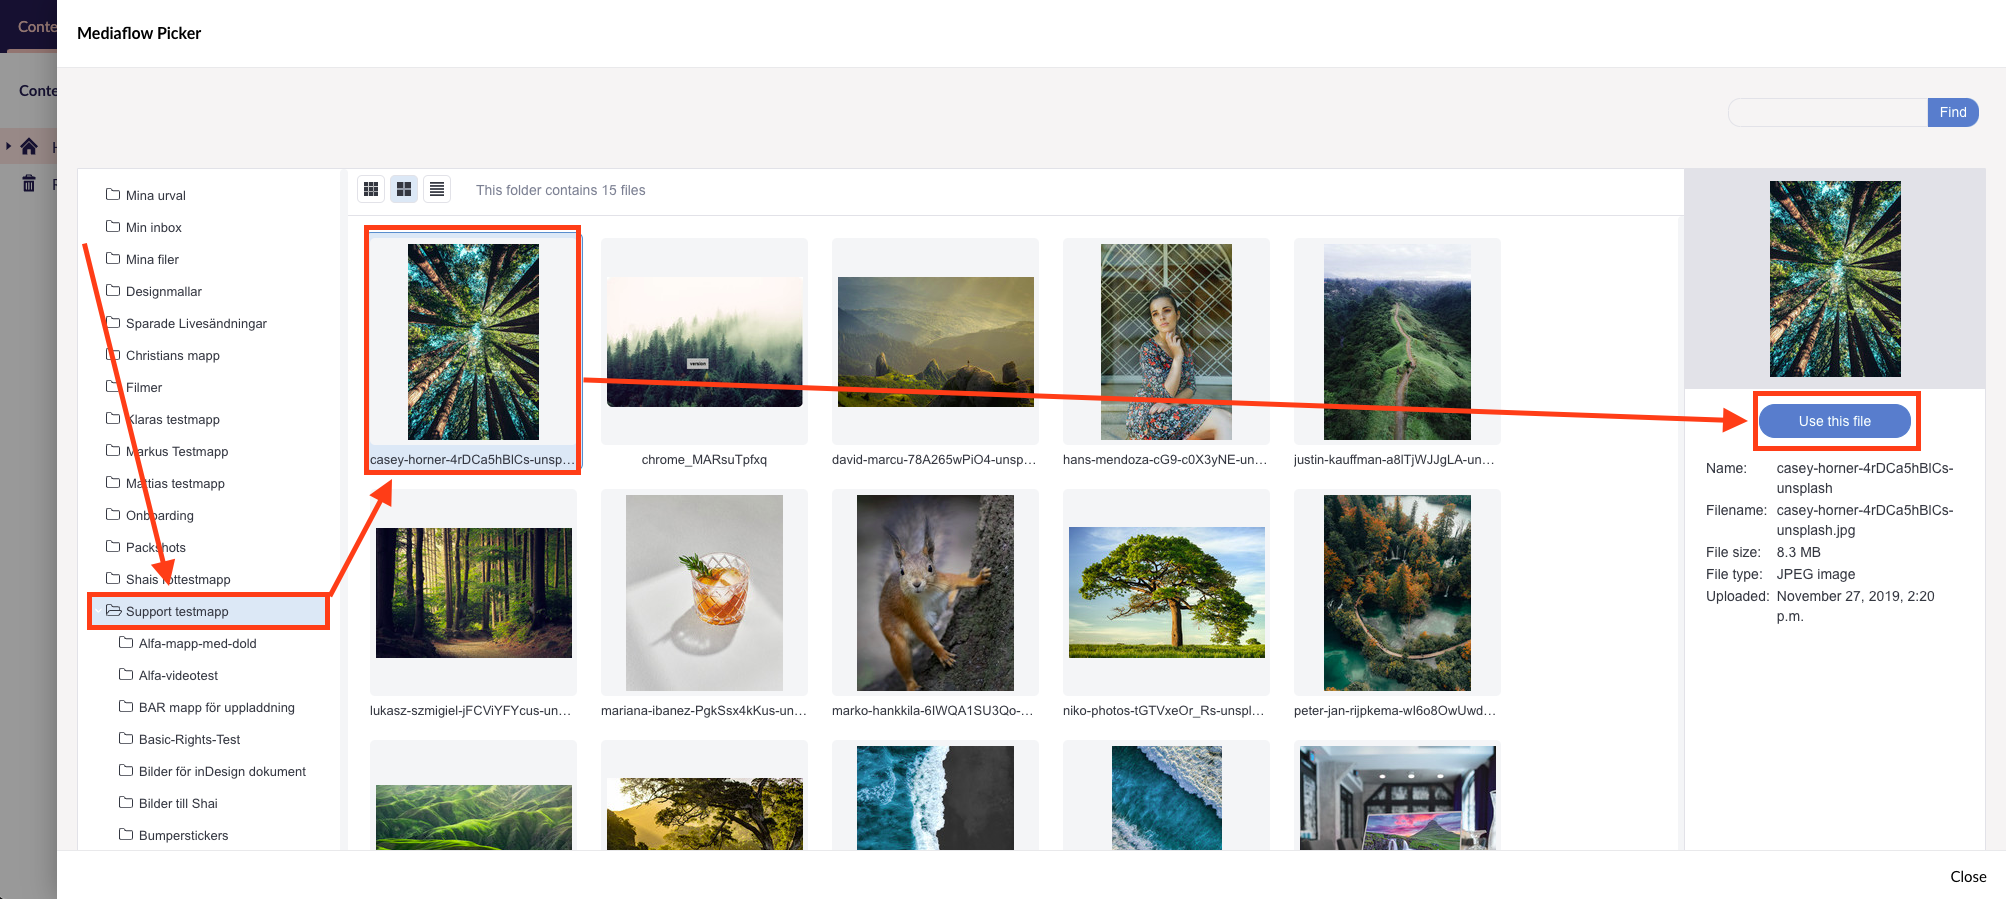
Find the image you want to use and then click the Use this file button.
-
Select the format and crop the image, then click the Insert File button.
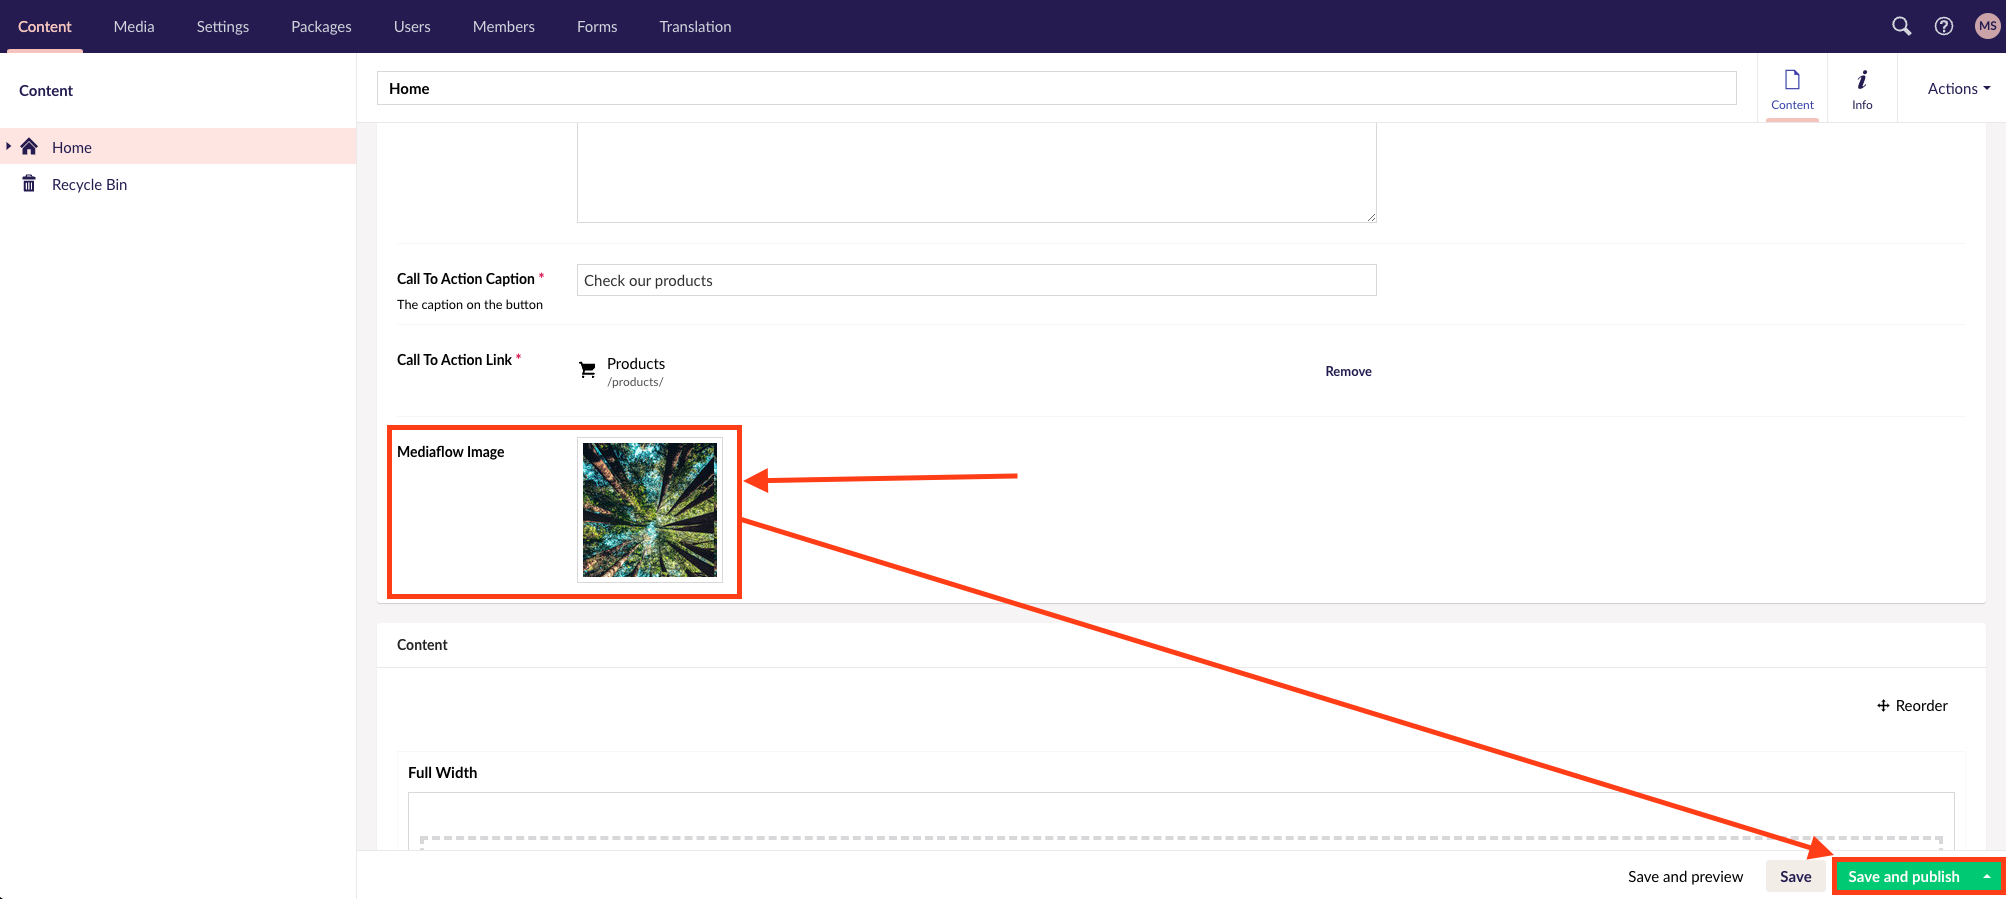
3. Your selected file is now displayed, click the Save and Publish button to publish your updates.
Bonus
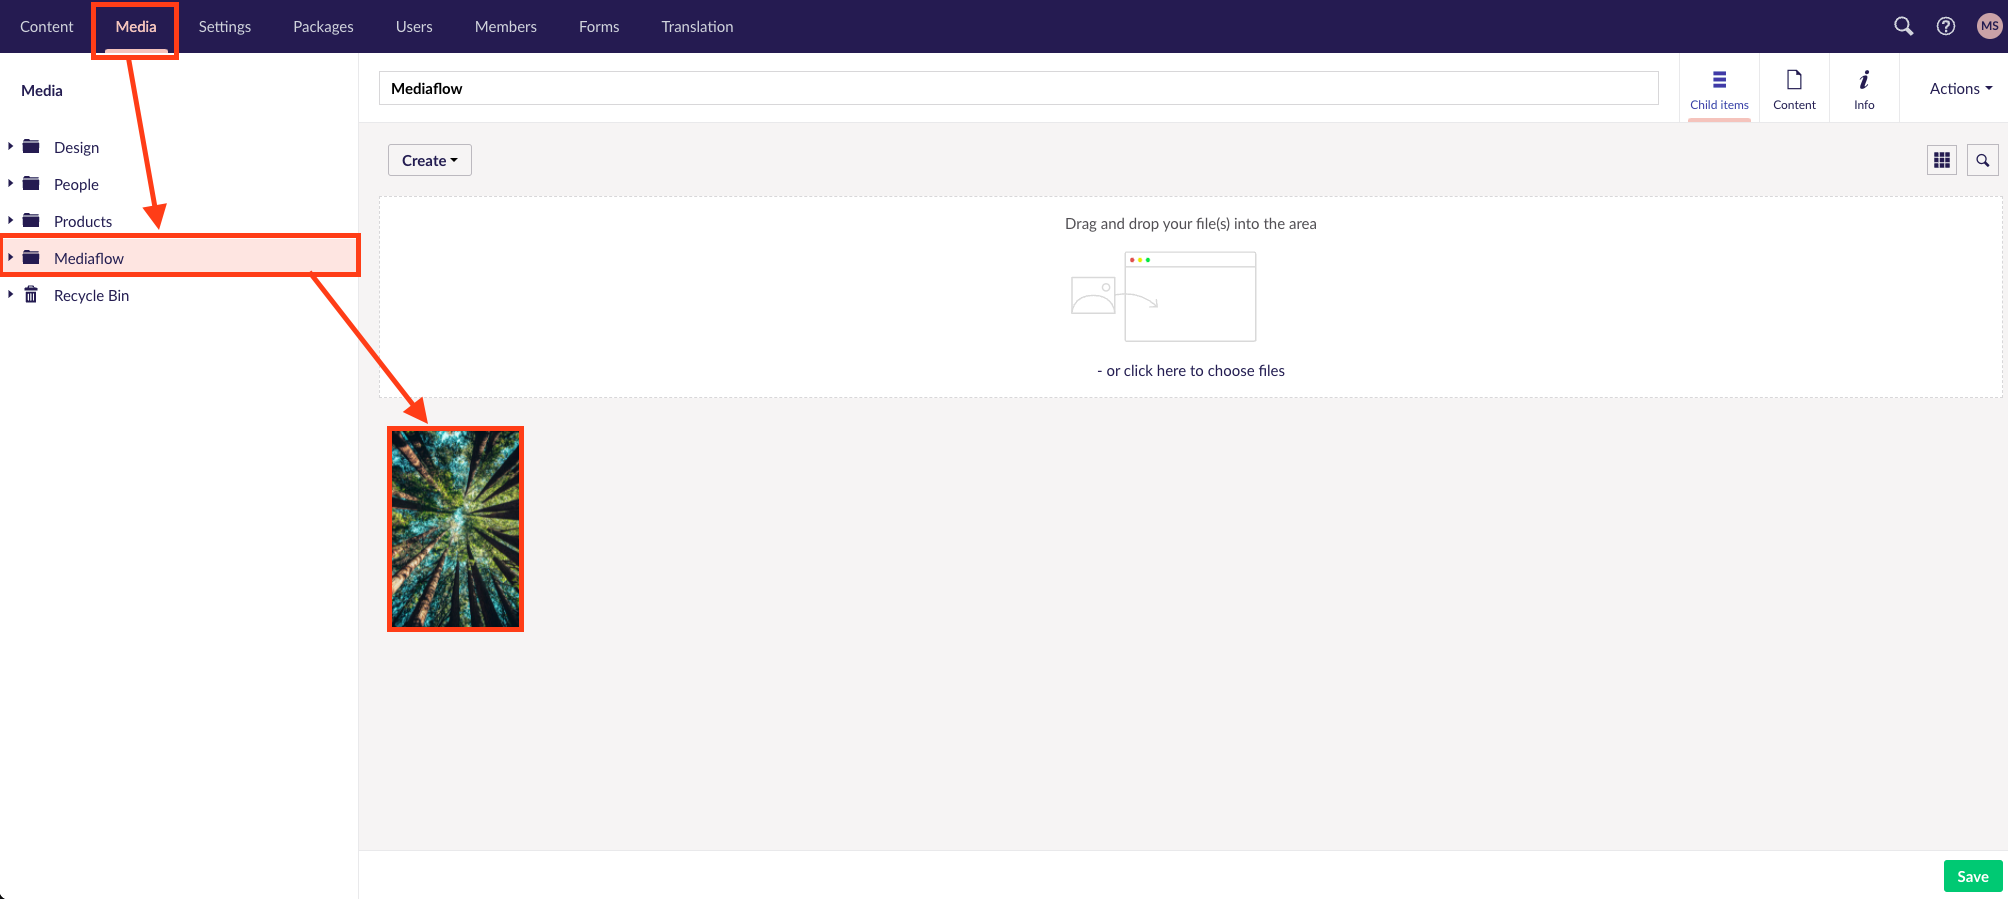
The plugin saves a local copy of the image you are mounting. This ends up in the Media section in Umbraco so that the file is downloaded from the same location as the other locally mounted images on your Umbraco site.